
TM 5-3805-264-13&P
0038
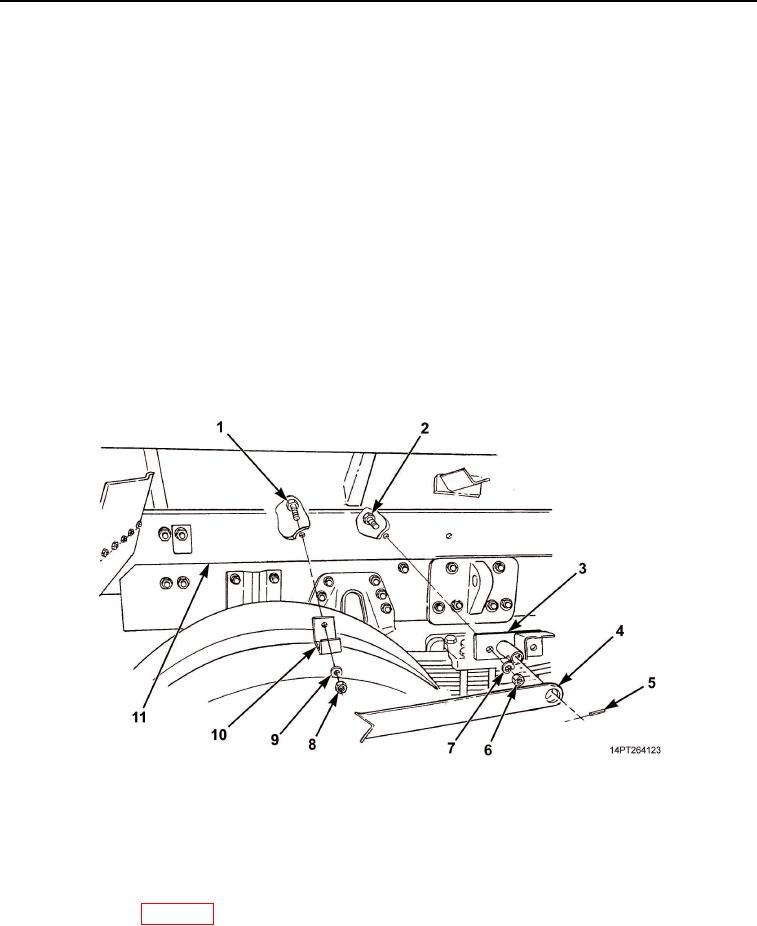
REMOVAL
1.
Remove spring pin (Figure 1, Item 5) and body prop (Figure 1, Item 4) from pivot bracket (Figure 1, Item 3).
Discard spring pin.
2.
Remove two nuts (Figure 1, Item 6), washers (Figure 1, Item 7), screws (Figure 1, Item 2), and pivot bracket
(Figure 1, Item 3) from frame (Figure 1, Item 11).
3.
Remove nut (Figure 1, Item 8), washer (Figure 1, Item 9), screw (Figure 1, Item 1), and support bracket
(Figure 1, Item 10) from frame (Figure 1, Item 11).
END OF TASK
INSTALLATION
1.
Install support bracket (Figure 1, Item 10) on frame (Figure 1, Item 11) with screw (Figure 1, Item 1), washer
(Figure 1, Item 9), and nut (Figure 1, Item 8).
2.
Install pivot bracket (Figure 1, Item 3) on frame (Figure 1, Item 11) with two screws (Figure 1, Item 2),
washers (Figure 1, Item 7), and nuts (Figure 1, Item 6).
3.
With body prop (Figure 1, Item 4) positioned above support bracket (Figure 1, Item 10), install body prop on
pivot bracket (Figure 1, Item 3) with new spring pin (Figure 1, Item 5).
Figure 1. Body Prop Replacement.
END OF TASK
FOLLOW-ON MAINTENANCE
Lubricate body prop (WP 0073).
END OF TASK
END OF WORK PACKAGE
03/15/2011Rel(1.10)root(maintwp)wpno(M1002726413)

