TRUCK SERVICE MANUAL
AXLE-REAR
E. Install and tighten the stud nuts or cap screws to
INSTALLATION OF BEARING CUPS
specified torque noted in "Tabulation of Torque Limits" at
IN CARRIER LEG BORES
back of Manual.
A.
Temporarily install the bearing cups, threaded
F. Alternately loosen one adjusting nut and tighten the
adjusting rings where employed and bearing caps.
opposite adjusting nut while turning the differential
Tighten the cap screws to the proper torque.
assembly to assure normal bearing contact and to keep
bearing cups straight in the bores.
G. Either of the following procedures will result in proper
differential bearing preload:
1. Establish a zero end play; no-preload condition with a
dial indicator. Tighten the adjusting nuts 13A to 2%
notches (total for both nuts) tight to correctly preload the
bearings; or:
2. Tighten adjusting nuts to spread the differential
bearing legs .006"-.010" (total for both legs) as
determined by a crescent shaped micrometer held at the
level of the leg pilot surfaces and parallel to the carrier
mounting flange.
H. Install adjusting nut locks and cap screws. Tighten to
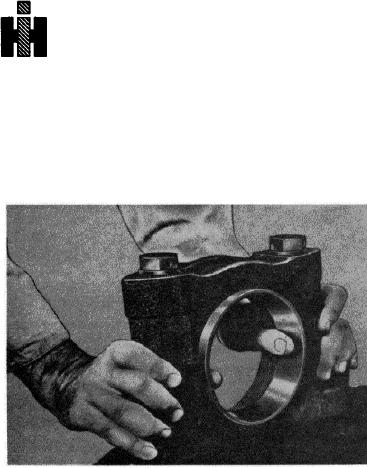
B. The bearing cups must be of a hand push fit in the
specified torque.
bores, otherwise the bores must be reworked with a
scraper or some emery cloth until a hand push fit is
I. Lock all parts in place with soft iron wire.
obtained. Use a blued bearing cup as a gauge and
check the fits as work progresses.
USE
THE
FOLLOWING
PROCEDURE
FOR
ADJUSTING DIFFERENTIAL BEARINGS ON UNITS
This applies to all types of carrier leg bores.
EMPLOYING TWO SPLIT RINGS:
USE
THE
FOLLOWING
PROCEDURE
FOR
A. Temporarily install differential with bearings and cups
ADJUSTING DIFFERENTIAL BEARINGS ON UNITS
in carrier housing and center between carrier leg
EMPLOYING TWO THREADED RINGS:
grooves.
A. Inspect carrier legs and bearing caps to be sure they
B. Insert thin split rings making certain that there is
are properly relieved at I.D. parting line.
clearance between bearing cup faces and rings. (Do not
install bearing caps.)
B. Apply Specified axle lubricant to bearing cups and
cones. Position cups over cones and install assembly in
C. By means of a dial indicator measure end play of
carrier.
differential assembly by shifting the assembly back and
forth between the rings with a small pair of pinch bars
C. Insert differential bearing adjusting nuts and turn hand
placed between the carrier legs and the spur gears.
tight against bearing cups.
D. Remove and measure the thickness of the rings. To
D. Position Bearing caps in place over bearing cups and
the total thickness of the two thin rings add the end play
adjusting nuts, making sure they are properly aligned.
figure plus another .017" to .022" to obtain the total
thickness of the two thicker rings required to obtain
Caution; If bearing caps do not seat easily and correctly,
proper bearing preload.
the adjusting nuts may be cross threaded. Forcing caps
in place will result in irreparable damage to the
E. NOTE: Hardened split rings are ground in increments
differential carrier and caps.
of. 005
44

