
TM 5-3805-264-13&P
0070
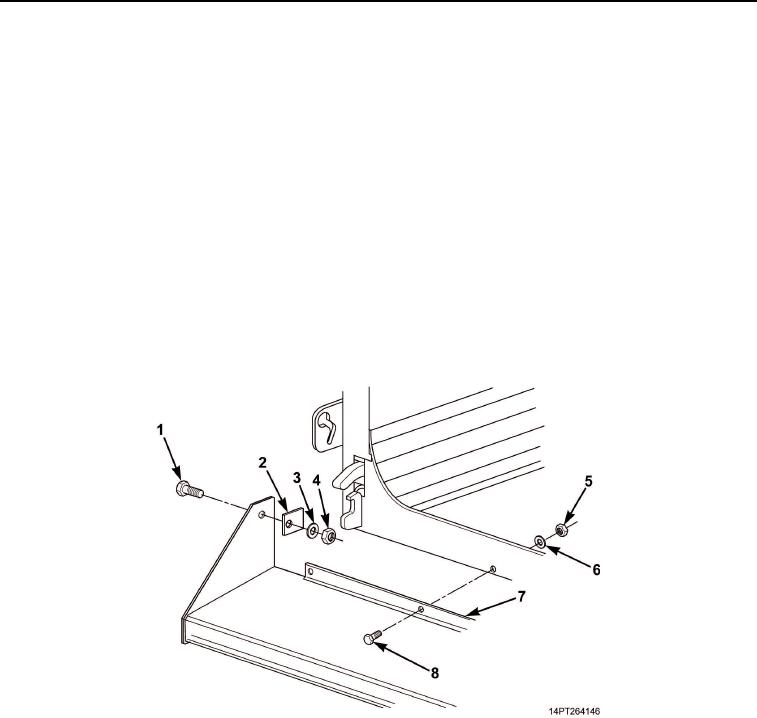
REMOVAL
1.
Remove locknut (Figure 1, Item 4), washer (Figure 1, Item 3), bolt (Figure 1, Item 1), and tab
(Figure 1, Item 2) from spill shield (Figure 1, Item 7). Discard locknut.
2.
Repeat Step 1 for opposite side.
3.
Remove six locknuts (Figure 1, Item 5), washers (Figure 1, Item 6), bolts (Figure 1, Item 8), and spill shield
(Figure 1, Item 7). Discard locknuts.
END OF TASK
INSTALLATION
1.
Position spill shield (Figure 1, Item 7) on dump body and install six bolts (Figure 1, Item 8), washers
(Figure 1, Item 6), and new locknuts (Figure 1, Item 5).
2.
Position tab (Figure 1, Item 2) on spill shield (Figure 1, Item 7) and install bolt (Figure 1, Item 1), washer
(Figure 1, Item 3), and new locknut (Figure 1, Item 4).
3.
Repeat Step 2 for opposite side.
Figure 1. Spill Shield Replacement.
END OF TASK
END OF WORK PACKAGE
03/15/2011Rel(1.10)root(maintwp)wpno(M1003726413)