
TRUCK SERVICE MANUAL
BRAKES-AIR
plunger parts and adjusting bolt threads to remove caked
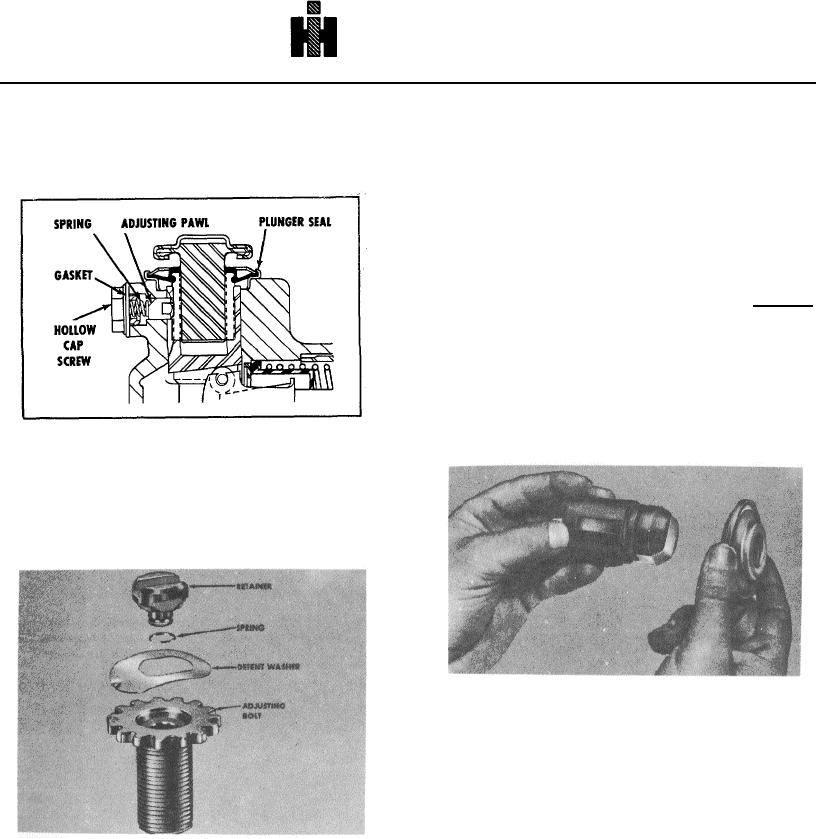
SERVICING PLUNGER
on dirt and corrosion.
HOUSING
Carefully inspect plunger seals and gaskets for tears,
DISASSEMBLE
cuts or deterioration, and replace if necessary. Also
A.
With brake shoes removed, remove guide
check the angled plunger roller faces for pits, grooves or
screws and gaskets from the plunger housing.
nicks and replace if necessary.
NOTE
: RD spider mounted brakes have one adjusting plunger
and one anchor (solid) plunger per plunger housing. The
anchor plungers are marked on the shoe slot end, "R" for
right hand brakes and "L" for left hand brakes. DO NOT
mix at reassembly.
B. ASSEMBLE SEALS ONTO PLUNGERS
IMPORTANT: DO NOT ASSEMBLE SEALS INTO
PLUNGER HOUSING FIRST. THIS WILL RESULT IN
COMPLETE LACK OF SEALING OF INTERNAL
PLUNGER HOUSING COMPONENTS.
1. Apply film of grease to inside surfaces of seals.
If brake is automatic adjusting remove hollow capscrew,
gasket, spring, and adjusting pawl. Use a small magnet
to remove pawl.
B.
Pry plunger seals loose and remove anchor
(solid) plungers, adjusting plungers, adjusting
sleeves (actuator), and adjusting bolt.
2.
On anchor (solid) plungers-inspect nose for
burrs. Mask brake shoe web slot in the plunger
nose with masking tape to protect seal.
If a four-piece adjusting bolt assembly is employed it
should also be disassembled.
ASSEMBLE
A.
Thoroughly inspect and clean all parts including
the housing plunger and seal bores and shoe rest pads.
DO NOT solvent clean any rubber parts (plunger seals.
or
gaskets).
Wire
brush
210