
TRUCK SERVICE MANUAL
BRAKES-AIR
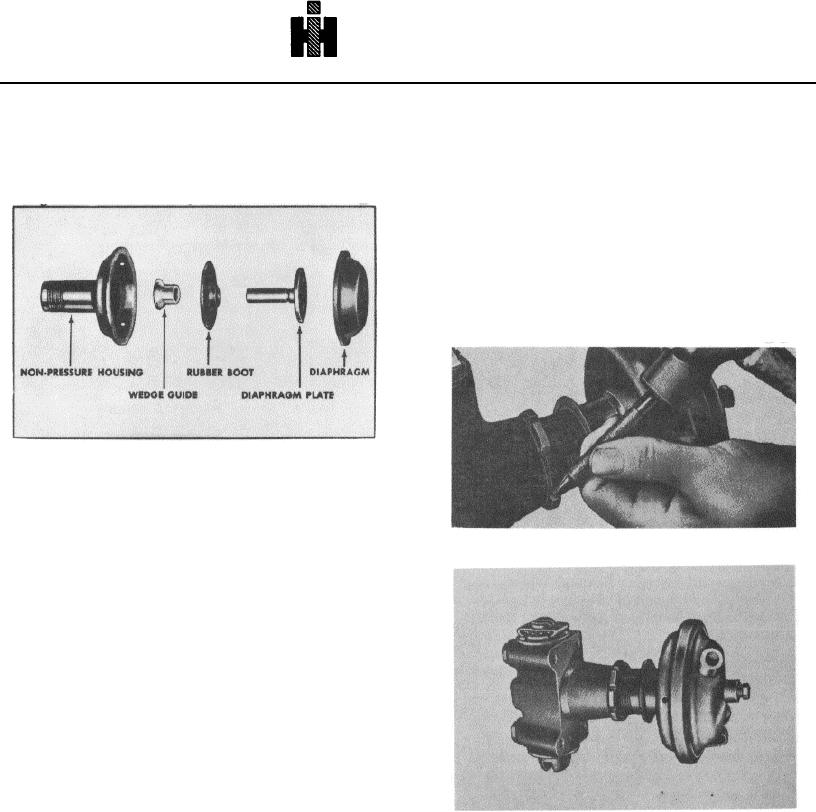
F.
Continue to hold plate and inspect boot. If boot is
torn or not attached to housing, strip old boot free
from housing and carefully re- move plate assembly
REMOVING POWER UNIT
off wedge rod and out of non-pressure housing
FROM BRAKE ASSEMBLY.
tube. (Boot and wedge guide will remain on plate
push rod.)
A.
Remove brake lines and tag emergency line.
B
Determine the type of power unit used, bottoming or
adjusting type. (Bottoming air chambers have an
identification tag fastened to the clamp ring bolt
C.
If adjusting type unit is used, carefully mark the
position of the assembly on the first exposed thread
on the housing tube with a scribe or punch and
hammer to aid reassembly.
G.
Remove wedge guide and old boot from push rod.
Inspect guide for wear and replace if necessary.
H.
Install new boot on diaphragm plate push rod and
press wedge guide all the way onto end of push rod.
D.
Using a drift or other blunt tool and hammer,
J.
Clean non-pressure housing with cement thinner or
loosen the collect nut.
similar material in area where boot is to be
cemented.
K
Apply cement to housing around tube end. Position
the plate-push rod assembly into tube. Carefully
engage wedge rod so as to not pull it out of
plungers.
L.
While holding plate against wedge, press boot into
position for cementing.
M.
Install new diaphragm over plate and onto
nonpressure housing while pushing plate against
wedge. Assemble pressure half and clamp ring in
reverse manner of disassembly.
NOTE
On welded on spider mounted brakes with open ends the
N.
Connect air lines to proper chamber ports. Make a
entire actuation system can be taken off at this time if
full-pressure brake application and check for air
desired as one assembly by removing four spider to
leaks.
Road test for brake performance.
plunger housing capscrews. However, the hub and drum
and dust shield will have to be taken off before removing
the actuation system.
205