
TM 5-3805-264-13&P
0039
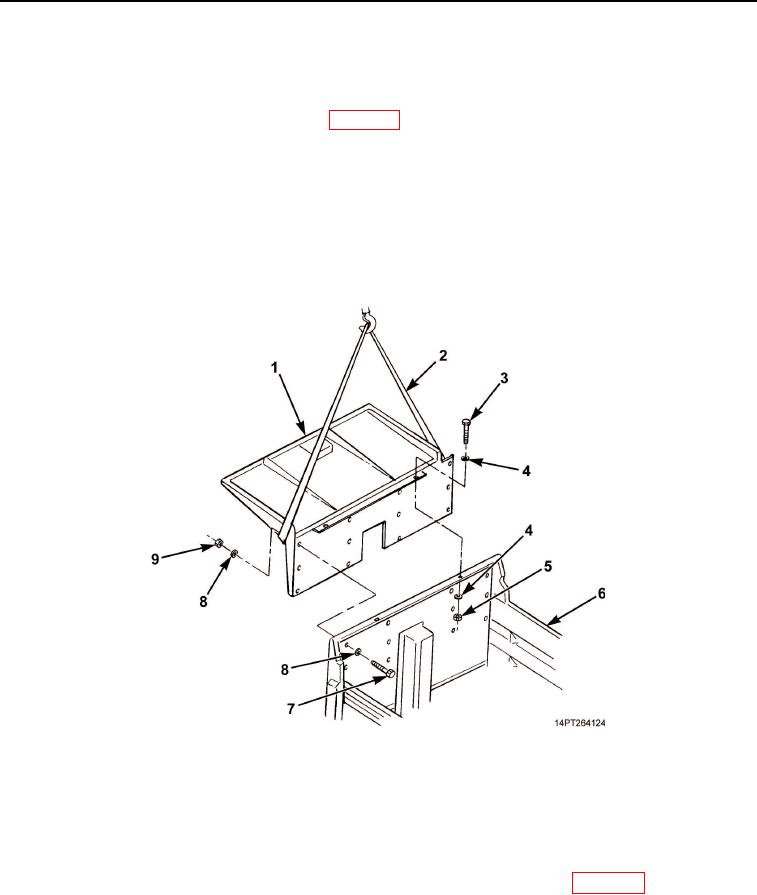
REMOVAL
1.
At center of cab shield (Figure 1, Item 1), remove six locknuts (Figure 1, Item 9), 12 washers
(Figure 1, Item 8), and six screws (Figure 1, Item 7). Discard locknuts.
2.
Remove body props and lower dump body (WP 0005).
3.
Attach lifting slings (Figure 1, Item 2) to cab shield (Figure 1, Item 1) and remove slack from lifting slings.
4.
Remove six locknuts (Figure 1, Item 9), 12 washers (Figure 1, Item 8), and six screws (Figure 1, Item 7)
from outside edges of cab shield (Figure 1, Item 1) and dump body (Figure 1, Item 6). Discard locknuts.
5.
Remove two locknuts (Figure 1, Item 5), four washers (Figure 1, Item 4), and two screws (Figure 1, Item 3)
from top of cab shield (Figure 1, Item 1) and dump body (Figure 1, Item 6). Discard locknuts.
6.
Lift cab shield (Figure 1, Item 1) from dump body (Figure 1, Item 6) and place cab shield in a safe work
area.
Figure 1. Cab Shield Removal.
END OF TASK
CLEANING AND INSPECTION
Clean and inspect components in accordance with General Maintenance Instructions (WP 0072).
END OF TASK
03/15/2011Rel(1.10)root(maintwp)wpno(M1002826413)