
TM 5-3805-264-13&P
0040
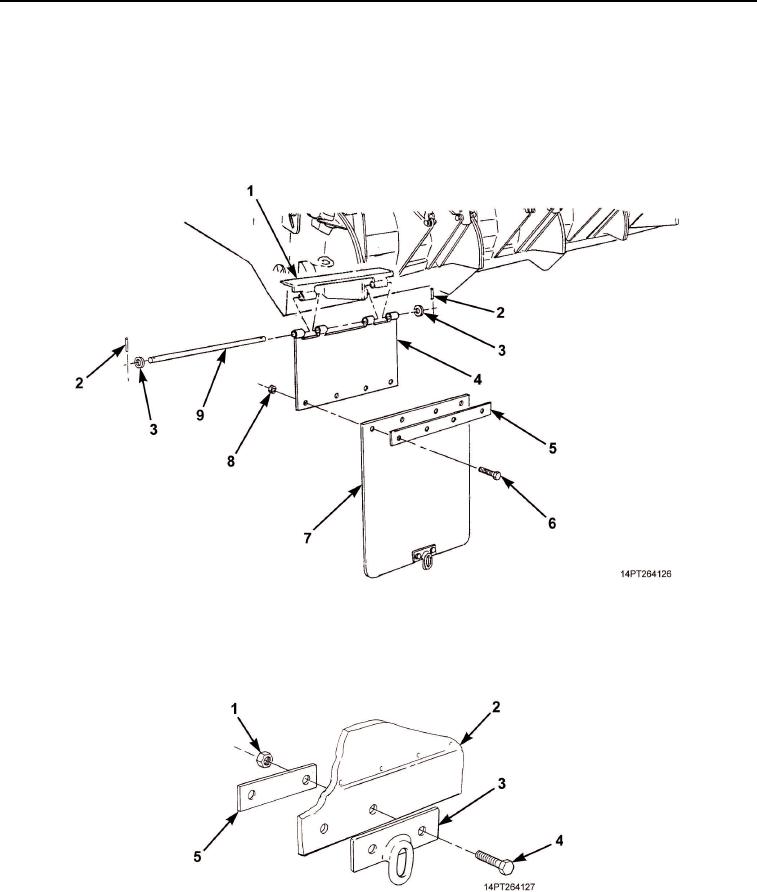
REMOVAL
1.
Remove four locknuts (Figure 1, Item 8), screws (Figure 1, Item 6), plate (Figure 1, Item 5), and mud flap
(Figure 1, Item 7) from mounting plate (Figure 1, Item 4). Discard locknuts.
2.
Remove two spring pins (Figure 1, Item 2), washers (Figure 1, Item 3), and shaft (Figure 1, Item 9), and
separate mounting plate (Figure 1, Item 4) from weldment (Figure 1, Item 1) on dump body. Discard
spring pins.
Figure 1. Mud Flap Removal.
3.
Remove two locknuts (Figure 2, Item 1), screws (Figure 2, Item 4), anchor plate (Figure 2, Item 5), and
mounting plate (Figure 2, Item 3) from mud flap (Figure 2, Item 2). Discard locknuts.
Figure 2. Mud Flap Hardware Removal.
END OF TASK
03/15/2011Rel(1.10)root(maintwp)wpno(M1002926413)