
TRUCK SERVICE MANUAL
a. Lubricating oil dilution or blocked injector spray
and assemble to adapter. Screw retainer down finger
holes.
tight and loosen turn.
b. Damaged injector sleeves or damaged injector
plungers.
CHECK BALL AND SEAT
1. Check the ball seat for nicks or burrs.
a. Do not attempt to improve the checkball seat by
inserting a ball and tapping. The barrel is as hard as
the ball and will damage the ball if attempted.
b. If the seat is marred, lap the barrel.
2. If any wear or mutilation is found, replace the ball.
PTD injector check balls are made of special
material. `Do not attempt to substitute with a
commercial made ball.
ADAPTER
1. Check balance orifice for burrs or other obstructions.
2. Inspect both fuel passages to be certain they are
open.
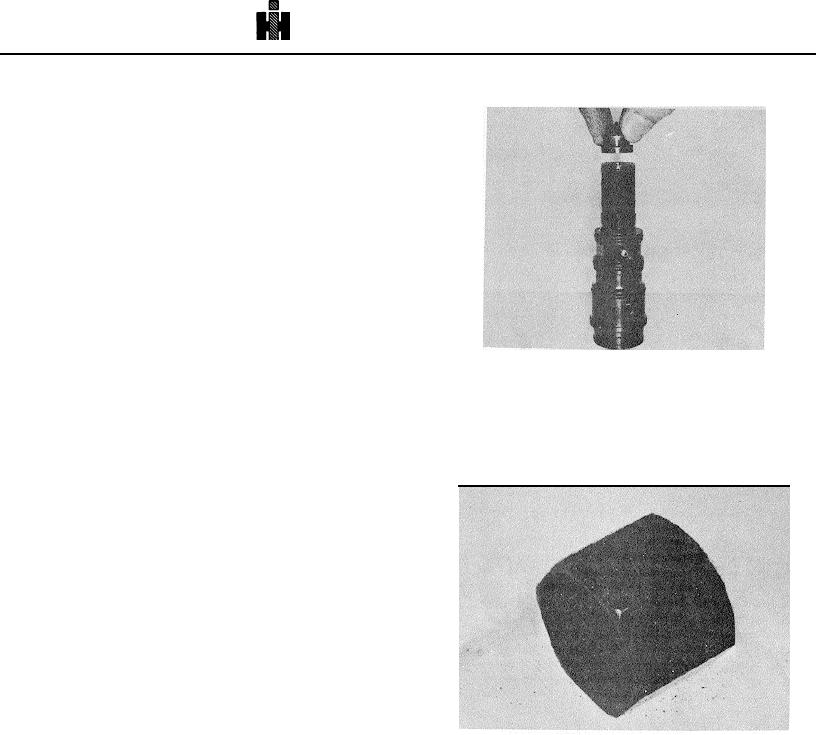
Fig. 6-1-32, F60194. Installing cup on barrel
3. Inspect cup retainer threads for damage.
6. Immerse injector plunger in clean injector test oil and
4. Check "O" ring areas for nicks or burrs which could
install in adapter without spring.
damage "O" rings during installation.
7. Raise 3375103 Special Stud in 3375084 Holding
5. Inspect barrel mating surface for nicks or burrs. If
Fixture.
damage is found, lap to repair.
8. Insert injector into loading fixture.
ASSEMBLY
PT (TYPE D) INJECTORS
The ST-1298 and 3375084 are two types of loading
fixture tools.
The ST-1298 has been redesigned so cup to
plunger, alignment pressure is maintained by an air
cylinder. The air cylinder reduces injector assembly
time.
If you have ST-1057 or 3375084 and wish to add the
air cylinder attachment, it is available as ST-1298-5111.
1. Drop check ball into top of barrel.
CAUTION: Be certain all mating surface parts are clean
and free of burrs or other imperfections which could
result in incorrect flow or torque. Lap to repair.
2. In repair of the injector, the gasket between the
barrel and adapter is required for 5/16 type only.
Fig. 6-1-30, Injector Cup Wrench - ST-995
3. Hold barrel with check ball up and place new adapter
9.
Slide 3375102 Body Wrench over flats on injector
spiral pins into barrel. (Roll pins are no longer used.)
adapter.
4. Turn adapter and barrel with barrel up and place cup
10.
Place ST-995 retainer wrench upon injector retainer
on barrel.
(Fig. 6-1-30).
5. Lubricate cup retainer threads and cup flange
11.
Lubricate threads of 3375103 stud and screw in
contact area with 20 or 30W lube oil
3375084 Loading Fixture stand far enough to hold
injector (Fig. 6-1-33).
12.
Tighten stud in 3375084 to 75 in. lbs. (8.5 N.m), Fig.
6-1-34, or activate air cylinder on ST-1298 to 70 psi
(483 kPa) to align cup and plunger. Fig. 6-1-35.
13.
Tighten cup retainer with ST-1072, Crowfoot
Wrench, and ST-995, Retainer Wrench, to 50 ft. lbs.
torque (Fig. 6-1-36).
462

