
TRUCK SERVICE MANUAL
TRANSMISSION
INSPECTION AND REBUILD
Para 6-17
Fig. 6-34 Staking pivot collector ring to forward clutch
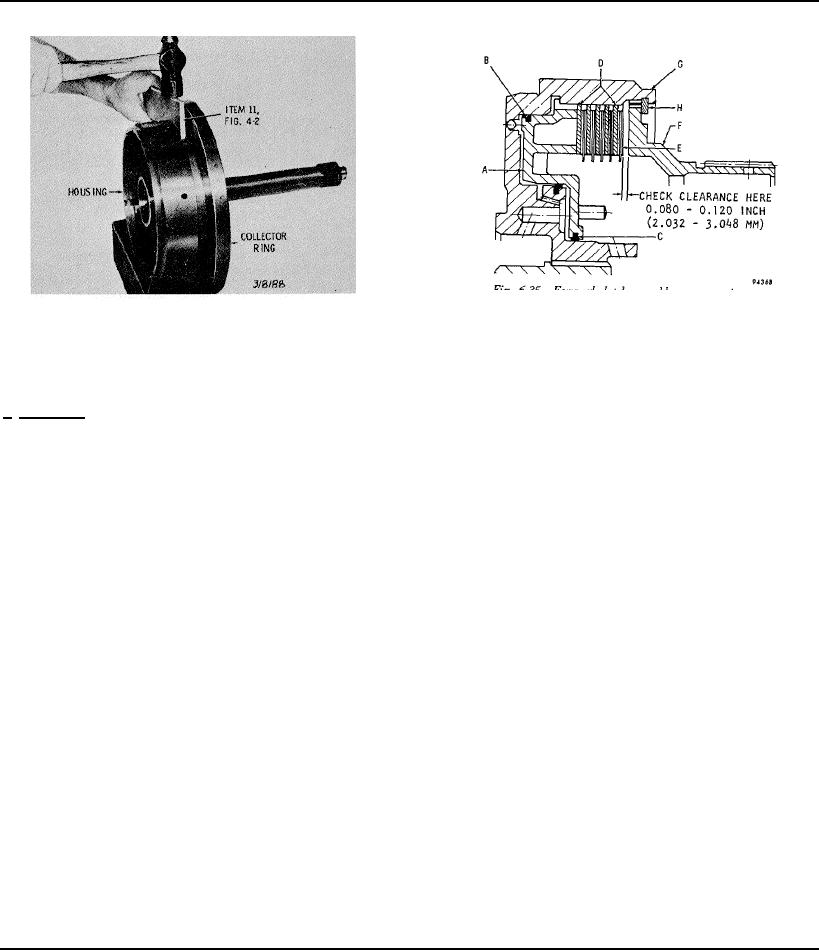
Fig. 6-35 Forward clutch assembly cross section
housing
(5) A clutch plate running clearance check is
NOTE
essential before completing the assembly rebuild. Items
Refer to paragraph 6-2, above.
(6) through (13), below, explain the procedure. Items (14)
through (20), below, complete the rebuild of the
b. Assembly (A, foldout 11)
subassembly.
NOTE
(1) If collector ring 6 was removed,
replace
If the forward clutch housing is replaced,
it with a new ring. Apply Loctite Retaining Compound 40
selection of a proper piston (A, B or C) is
to the joint and install the ring (fig. 6-33)Use installer 12
imperative before sealring installation. If
(fig. 4-2)to drive the collector ring onto the clutch housing
the forward clutch housing is not
(fig. 6-33)Use light hammer blows, and work around the
replaced and a new piston is required,
entire installer circumference.
make sure the identification letter
stamped on the new piston is identical to
(2) Using staking tool 11 (fig. 4-2), bend the
that on the old piston.
edge of the ring into the groove in the clutch housing (fig.
6-34)Check the four steel balls in the housing (fig. 6-
(6) Usingfigure6-35as a guide, place forward
32)They must be free to move, unobstructed, and
piston A on the work table with the return spring bosses
securely staked.
up. Grease and install lip-type sealring B and C, lips of
the seals facing downward.
(3) Position the forward clutch housing and shaft
assembly 5 (A, foldout 11), turbine shaft down, on a work
(7) Install piston A into forward clutch housing G.
table.
Make sure the lips of sealrings B and C are facing the
bottom of the piston cavity. Install seal protector 15 (fig.
(4) Grease and install sealring 12 into the
4-2) onto the clutch housing hub before installing the
sealring groove in the forward clutch housing. Be sure
piston (fig. 6-36).
the lip of the seal faces upward (rearward) (fig. 6-35).
(8) Beginning with an external-tangled plate,
CAUTION
alternately install five external-tangled plates D (fig. 6-35)
If sealring 12 is installed incorrectly, rough shifts in
and five internal-splined plates E into forward clutch
forward gears will occur.
housing G.
(9) Install fourth-clutch driving hub F into housing
G.
(10) Install snapring H.
752