
TRUCK SERVICE MANUAL
TRANSMISSION
HT 700D SERIES TRANSMISSIONS
Para 6-18
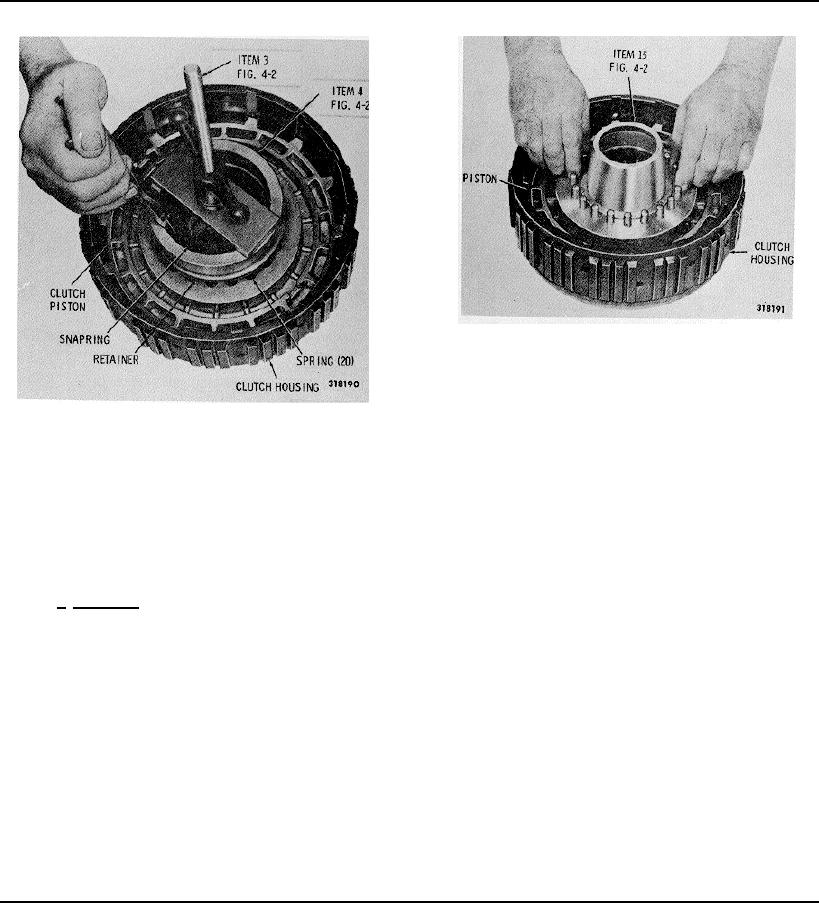
Fig. 6-12 Installing fourth clutch piston
NOTE
If the forward clutch housing is replaced,
Fig. 6-41 Removing (or installing) fourth clutch spring
selection of a proper piston (A, B or C) is
retainer snapring
imperative before sealring installation. If
the forward clutch housing is not
(9) Remove sealrings 10 (B, foldout 11) and 11.
replaced and a new piston is required,
make sure the identification letter
(10) Check balls 13, as outlined in paragraph 6-
stamped on the new piston is identical to
17b(2), above.
that on the old piston.
NOTE
(4) A clutch plate running clearance check is
Refer to paragraph 6-2, above.
essential before completing the assembly. Items (5)
through (7), below, explain the procedure. Items (8)
b. Assembly (B, foldout 11)
through (12), below, complete the rebuild of the
assembly.
(1) Place fourth-clutch housing assembly 12 (B,
foldout 11) on the work table, flat (rear) side downward.
(5) Beginning with an external-tangled plate,
alternately install five external-tangled plates and five
(2) Grease (oil-soluble grease) and install
internal-splined plates into the fourth-clutch housing (fig.
sealring 11 into the clutch housing. Be sure the lip of the
6-40).
sealring is facing the bottom of the piston cavity.
(6) Install the back plate and snapring (fig. 6-30).
(3) Place fourth-clutch piston 9 on the work table,
spring bosses side up. Grease and install sealring 10, lip
(7) Hold the back plate firmly against the
downward, into the groove on the outside circumference
snapring. Insert gage 42 (fig. 4-3) and check the
of the piston. A sealring for the inside groove in piston 9
clearance at the location shown in figure 6-43. When
is not required. Install the piston into the clutch housing,
clearance is satisfactory, the thinner step of the gage will
using inner seal protector 13 (fig. 4-2) to center and
enter between the back plate and clutch plates; the
guide the piston, although no seal contacts the tool (fig.
thicker
6-42).
755