
TM 5-3805-264-13&P
0037
REMOVAL - Continued
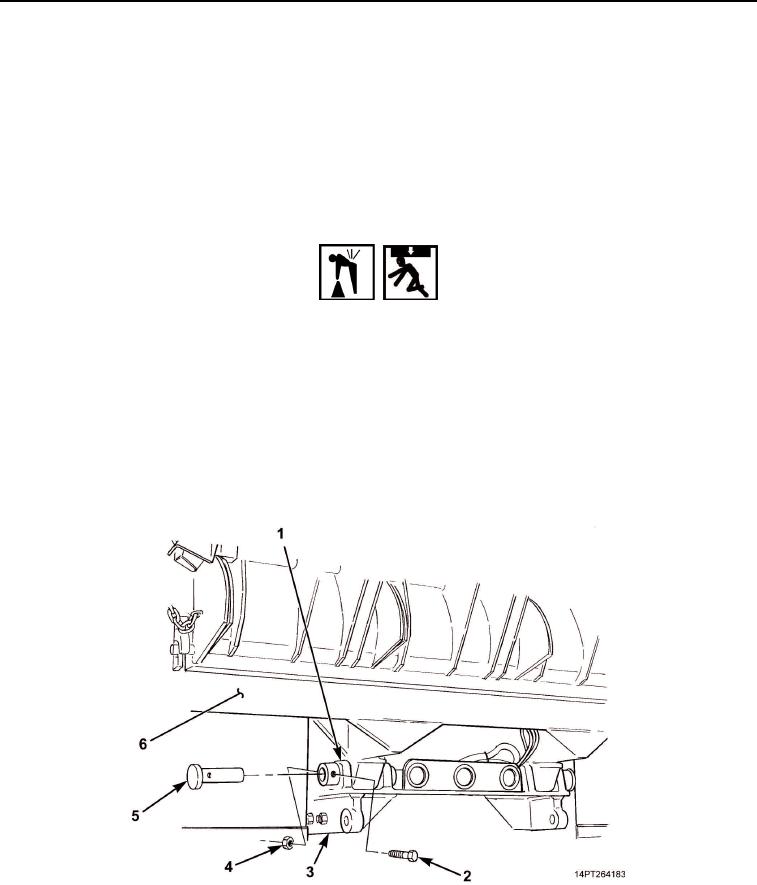
6.
Using suitable lift with chains, lower front of dump body (Figure 4, Item 6).
7.
Attach suitable lift with chains at four corners of dump body (Figure 4, Item 6). Take up slack in chains with
lift.
8.
Remove two locknuts (Figure 4, Item 4) and screws (Figure 4, Item 2) from rear hinge (Figure 4, Item 1) and
hinge pins (Figure 4, Item 5). Discard locknuts.
9.
Remove driver's side and passenger's side hinge pins (Figure 4, Item 5) from rear hinge (Figure 4, Item 1).
WARNING
Use extreme care when handling heavy parts. Lifting cables, chains, hooks, and slings
must be in good condition and of suitable capacity. Keep clear of parts supported only by
lifting device. Failure to comply may result in personnel injury, death, and/or damage to
equipment.
NOTE
Before removing dump body from vehicle chassis, perform a trial lift to ensure body is
balanced and will lift straight and level from vehicle chassis.
10.
Remove dump body (Figure 4, Item 6) from vehicle chassis (Figure 4, Item 3). Place dump body on suitable
supports and remove lifting device and chains.
Figure 4. Hinge Pin Removal.
03/15/2011Rel(1.10)root(maintwp)wpno(M1004526413)