
TM 5-3805-264-13&P
0052
REMOVAL - Continued
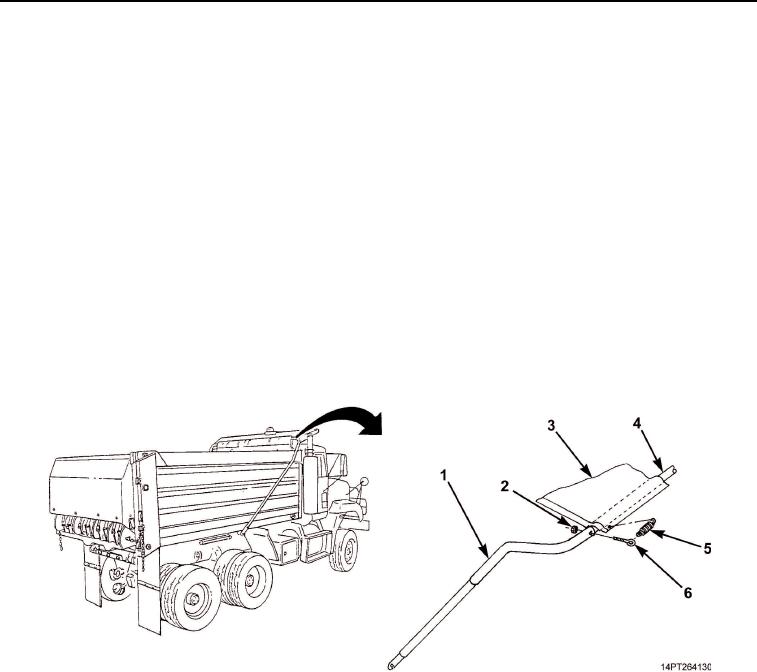
3.
Uncrimp and remove centering springs (Figure 2, Item 5) from eye bolts (Figure 2, Item 6) and grommets in
cargo cover (Figure 2, Item 3).
4.
Remove two locknuts (Figure 2, Item 2) and eye bolts (Figure 2, Item 6) from cross arm (Figure 2, Item 4)
and connecting arms (Figure 2, Item 1). Discard locknuts.
5.
Remove cross arm (Figure 2, Item 4) from connecting arms (Figure 2, Item 1). Slide cross arm from cargo
cover (Figure 2, Item 3). Remove cargo cover.
END OF TASK
INSTALLATION
1.
Install cross arm (Figure 2, Item 4) through pocket in cargo cover (Figure 2, Item 3).
2.
Install cross arm (Figure 2, Item 4) into each connecting arm (Figure 2, Item 1) and secure with two eye
bolts (Figure 2, Item 6) and new locknuts (Figure 2, Item 2).
3.
Attach two centering springs (Figure 2, Item 5) to eye bolts (Figure 2, Item 6) and to grommets in cargo
cover (Figure 2, Item 3). Crimp spring ends.
Figure 2. Cargo Cover.
03/15/2011Rel(1.10)root(maintwp)wpno(M1003026413)