TM 5-3805-254-20-1
ACCELERATOR CONTROL PEDAL - CONTINUED
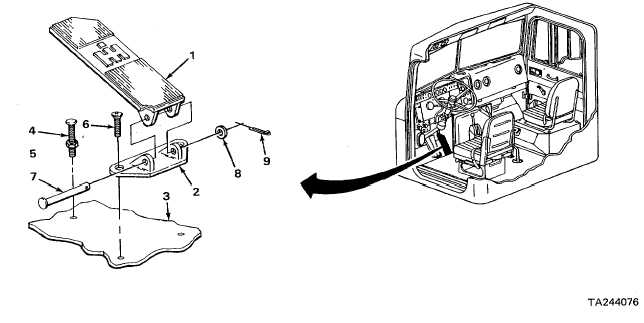
ACTION
LOCATION
ITEM
REMARKS
INSTALLATION
8.
All threaded parts
Look for damaged threads.
9.
Floor panel (3)
Bolt (4) and
a.
Turn locknut to end of threads.
locknut (5)
b.
Screw in bolt.
Do not tighten.
10.
Pedal bracket (2)
a.
Put pedal bracket in place.
and two screws (6)
b.
Screw in and tighten using number three
cross-tip screwdriver.
11.
Pedal bracket (2)
Control pedal (1)
a.
Put control pedal in place.
and clevis pin (7)
b.
Put in clevis pin using 6-inch slip-joint
pliers.
NOTE
For more information on cotter pins, go to General Maintenance Instructions (page 2-424).
12.
Flat washer (8) and
a.
Put on flat washer.
new cotter pin (9)
b.
Put in cotter pin and bend back ends
using 6-inch diagonal-cutting pliers.
2-577